hugobook의 스타일 변경
2023년 6월 18일
웬만한 기능은 다 리드미에 있고, 폰트나 스타일 변경도 다 리드미에 적혀있는것같다.
폰트 변경 #
예시 #
아래는 폰트의 설정을 지정한다. @font-face로 폰트를 ‘Noto Sans’ 라는 이름으로 로드하고,
body에서 위에서 로드한 ‘Noto Sans’를 사용하는데 없다면 sans-serif 폰트를 기본값으로 지정한다는 뜻이다.
보통 하나의 폰트에는 여러 스타일과 두께가 포함되어 있어서 하나의 폰트로 여러 스타일에 사용해도 된다.
1@font-face {
2  font-family: 'Noto Sans';
3  src: url('noto-sans.woff2') format('woff2');
4}
5
6body {
7  font-family: 'Noto Sans', sans-serif;
8}
hugobook에서의 폰트 변경 #
themes/hugo-book/assets/_fonts.scss 파일을 assets/_fonts.scss에 복사 후 커스텀 폰트로 변경하면 된다.
파일은 static/fonts/[폰트파일] 위치에 다운받는다.
font-display를 swap으로 설정하면 폰트가 다운로드 되면 폰트를 교체하는 방식이다.
font-family: 폰트 패밀리명
font-style: 폰트 스타일 (일반/기울임/굵게 등)
font-weight: 폰트 두께
font-display: 폰트 로드 방식 (display/block/swap/fallback/optional)
src: 폰트 파일 경로
format: woff => woff, ttf => truetype, otf =>opentype
 1/* roboto-regular - latin */
 2@font-face {
 3  font-family: 'Roboto';
 4  font-style: normal;
 5  font-weight: 400;
 6  font-display: swap;
 7  src: local(''),
 8       url('fonts/roboto-v27-latin-regular.woff2') format('woff2'), /* Chrome 26+, Opera 23+, Firefox 39+ */
 9       url('fonts/roboto-v27-latin-regular.woff') format('woff'); /* Chrome 6+, Firefox 3.6+, IE 9+, Safari 5.1+ */
10}
11
12/* roboto-700 - latin */
13@font-face {
14  font-family: 'Roboto';
15  font-style: normal;
16  font-weight: 700;
17  font-display: swap;
18  src: local(''),
19       url('fonts/roboto-v27-latin-700.woff2') format('woff2'), /* Chrome 26+, Opera 23+, Firefox 39+ */
20       url('fonts/roboto-v27-latin-700.woff') format('woff'); /* Chrome 6+, Firefox 3.6+, IE 9+, Safari 5.1+ */
21}
22
23/* roboto-mono-regular - latin */
24@font-face {
25  font-family: 'Roboto Mono';
26  font-style: normal;
27  font-weight: 400;
28  font-display: swap;
29  src: local(''),
30       url('fonts/roboto-mono-v13-latin-regular.woff2') format('woff2'), /* Chrome 26+, Opera 23+, Firefox 39+ */
31       url('fonts/roboto-mono-v13-latin-regular.woff') format('woff'); /* Chrome 6+, Firefox 3.6+, IE 9+, Safari 5.1+ */
32}
33
34body {
35  font-family: 'Roboto', sans-serif;
36}
37
38code {
39  font-family: 'Roboto Mono', monospace;
40}
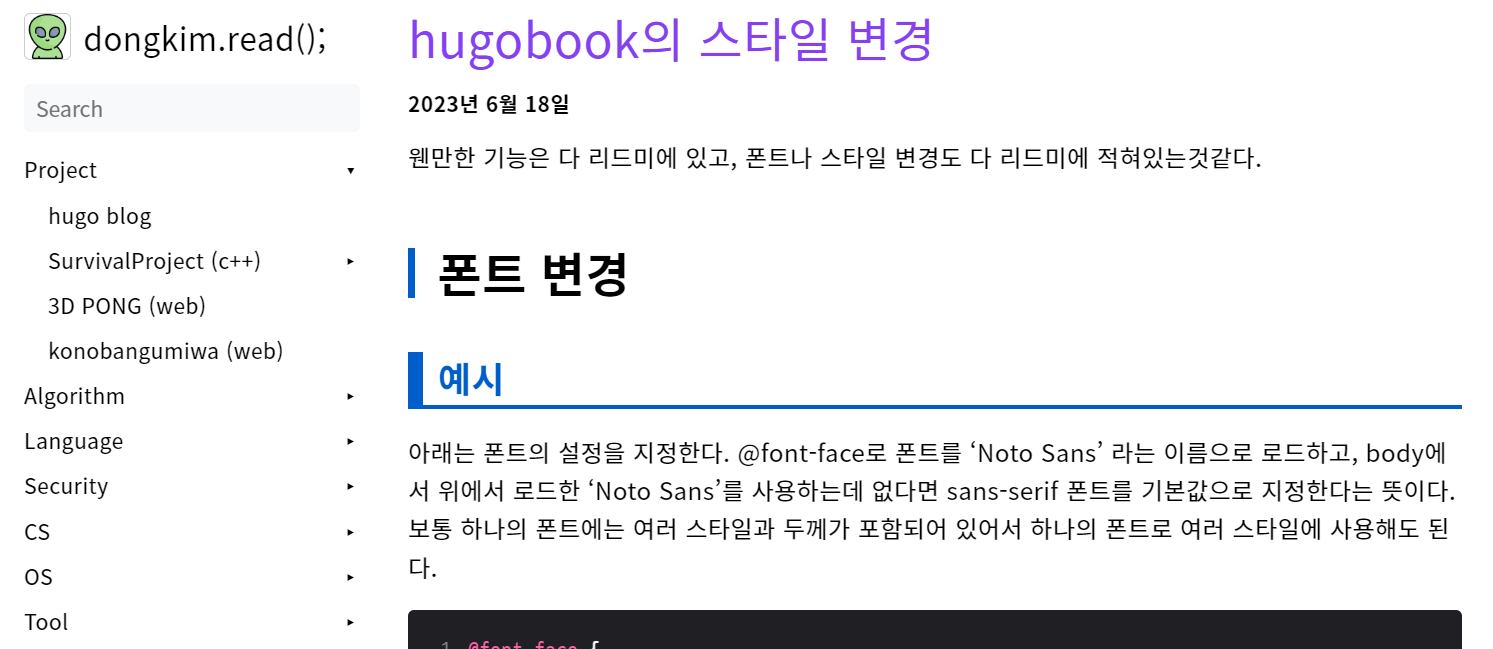
css 스타일 변경 #
font 파일과 같은곳에 있는 scss 파일들을 변경 _markdown.scss를 변경하면 마크다운의 태그스타일을 변경할 수 있을것이다.
모두코드의 h3의 스타일이 마음에 들어서 비슷하게 구현해보겠다.
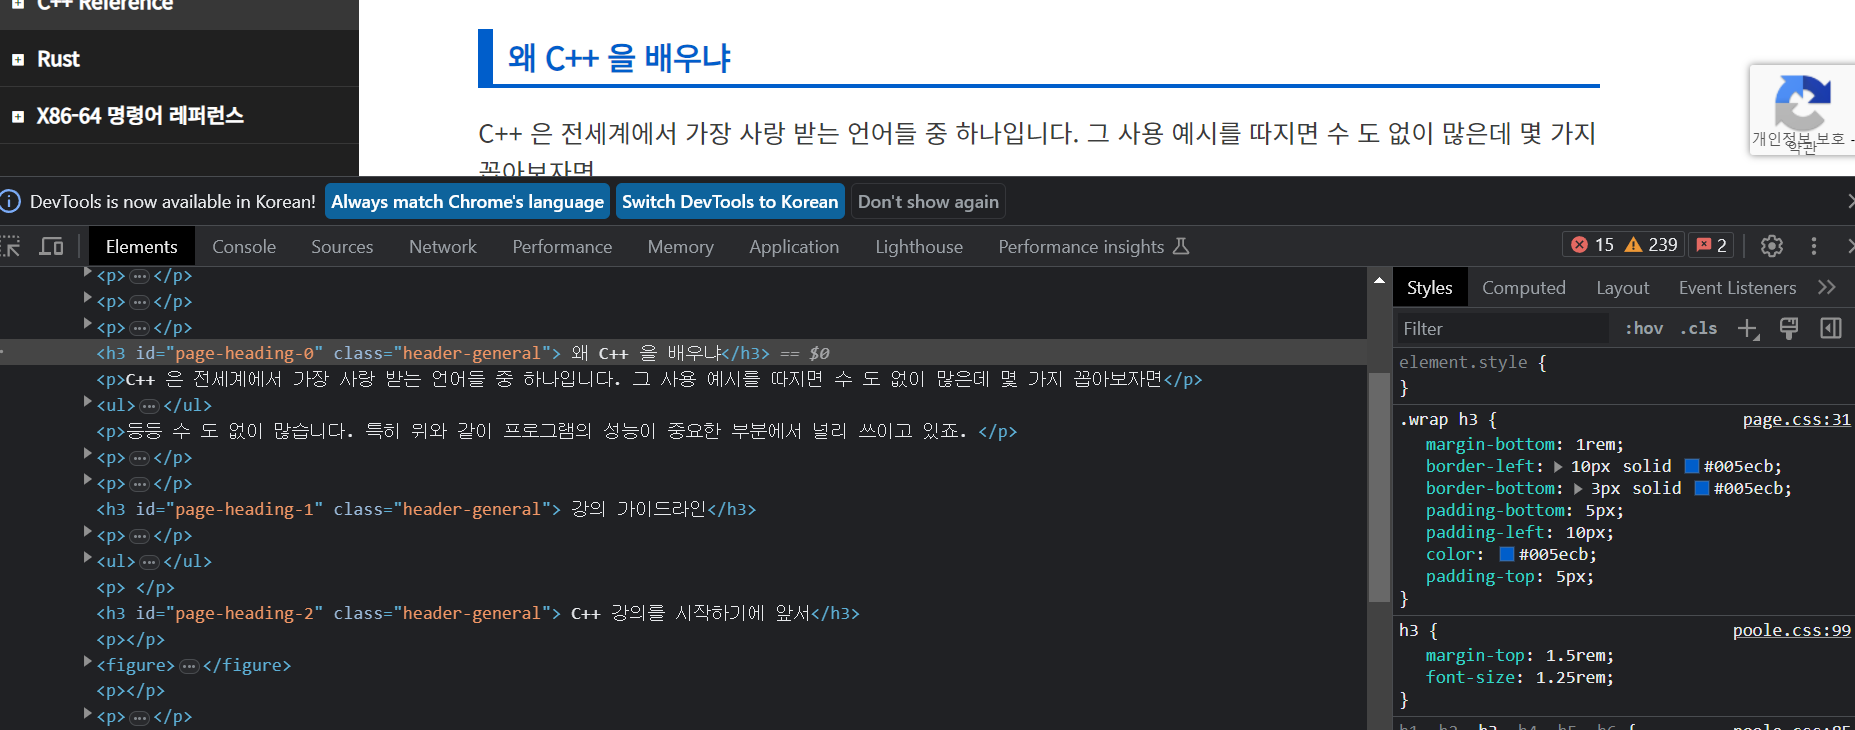
_variables.scss에서 스타일을 override하면 된다. 적용 후 얼추 비슷해진것을 확인할 수 있다.
아래는 assets/_variables.scss의 코드
 1/* You can override SASS variables here. */
 2
 3// @import "plugins/dark";
 4
 5$color-blue: #005ecb;
 6$color-lightblue: #42A5F5;
 7$color-gray: #CCCCCC;
 8
 9.markdown {
10  h2 {
11    font-size: 2rem; /* 글꼴 크기 키우기 */
12    font-weight: bolder !important; /* 텍스트를 두껍게 표시 */
13    padding-left: 15px; /* 텍스트 왼쪽 여백 추가 */
14    border-left: 5px solid $color-blue; /* 왼쪽 테두리 추가 및 색상 지정 */
15  }
16
17  h3 {
18    font-size: 1.5rem;
19    font-weight: bolder !important;
20
21    border-left: 10px solid $color-blue;
22    border-bottom: 3px solid $color-blue;
23
24    padding-bottom: 5px;
25    padding-left: 10px;
26    padding-top: 5px;
27    color: $color-blue;
28  }
29
30}
31
32img {
33  border: 1px solid $color-gray;
34  border-radius: 0.25rem;
35}